skip to main |
skip to sidebar
Hello again and welcome back to my blog. I apologize for the long delay between posts. I have been a little "under the weather" and not feeling up to doing much. Getting much better though and I will be back at it here as I make progress.
As promised there will be more pictures today with a little closer inspection of the car and it's overall condition.
First, a couple of other items. I am officially the cars second owner. The guy I bought it from made an offer to the widow of the original owner, bought the car, got it running (sort of) and then flipped it. It's sort of nice to know that the car has not been through a lot of hands and abuse before coming to me. It was also, at some time in the past, a Southern California car, there is a sticker in the engine compartment from a now long defunct repair shop in the San Fernando valley.
But I digress, on to the details!
Front
Sorry about the quality, this was late in the afternoon a couple of weeks ago, before the heat wave hit us here in So Cal. The front grill will need to be completely reconditioned or replaced. You can see the different tones of yellow on the car. It looks like the paint just wore off over time and use of the car and someone just grabbed a can of yellow at the local hardware store to cover it back up.
Here's a closer look at the passenger side front fender. It has a ding in the area just in back of the headlight, it funny how no one seemed to care about the missing paint here. Depending on how this fender looks after the paint is off and how much it will cost to straighten it out, I may spring for a new fender to replace this one.
Another view of the ding in the fender and a look at the hood, more later on the hood. The cost to fix this ding and the dings around the wheel arch may put the repair cost over the cost of a new one from TRF.
Oh, and another added bonus is the front chin spoiler!
You have to love the way this is held on to the car on the passenger side, a bungee cord! Something else to add to the list.
Hood
Yes, that's a bit of bondo that has flaked off of the hood from a previous repair that looks like it was done by a 5 year old. Just sort of slapped on, no smoothing or feathering at the edges. It's hard to figure out what happened here unless something was dropped on the hood and caused the dent.
You can see under the front lip of the hood there is some rust and uneven surfaces.
This shows where the top skin of the hood has pulled away from or the frame has been pushed down on the side with the filler repair. Compared to the other side that is.
Look at the left front corner of the support frame in this shot versus what the right side looks like. A rather large gap there and it would be very hard to repair this cost effectively, so I'm in the market for a new or used hood in decent shape.
Driver's Side
OK, the front fender on the driver's side looks to be in really good condition and an inspection underneath confirms that it' in really good condition, a keeper.
The driver's side door, you can see the spray patch up towards the top of the door. The previous owner had driven with his arm hanging out the door and rubbed the paint through to the primer. What can't be seen here are the little dings in the door from the parking lot wars. Lots of little places where someone used this car as their door stop for their car door, not surprising. Also of some concern is the door gaps, they seem a little large at the front and back, or it could just be an illusion, there's no door seal on the inside so the door is loose and flops around a little.
There are just a few spots here where you can see some surface rust developing in the seams between the fenders and the main body shell. Close ups to follow.
This is right behind the door, notice the crack in the paint? Just something to keep an eye on as, could there be rust in the seam here?
Sorry this is a little out of focus, but this is just a little further back on the driver's side as well. I took a screwdriver to this little bubble area and it was just a surface blemish.
Again, just a little further back on the driver's side and another little surface blemish.
Again, the driver's side of the car jst at the junction of the fender, body shell and trunk area. All of these blemishes, as I call them, were all surface rust areas and some tapping and digging with a pointed awl did not cause any breakthrough. Pretty good so far.
Passenger Side
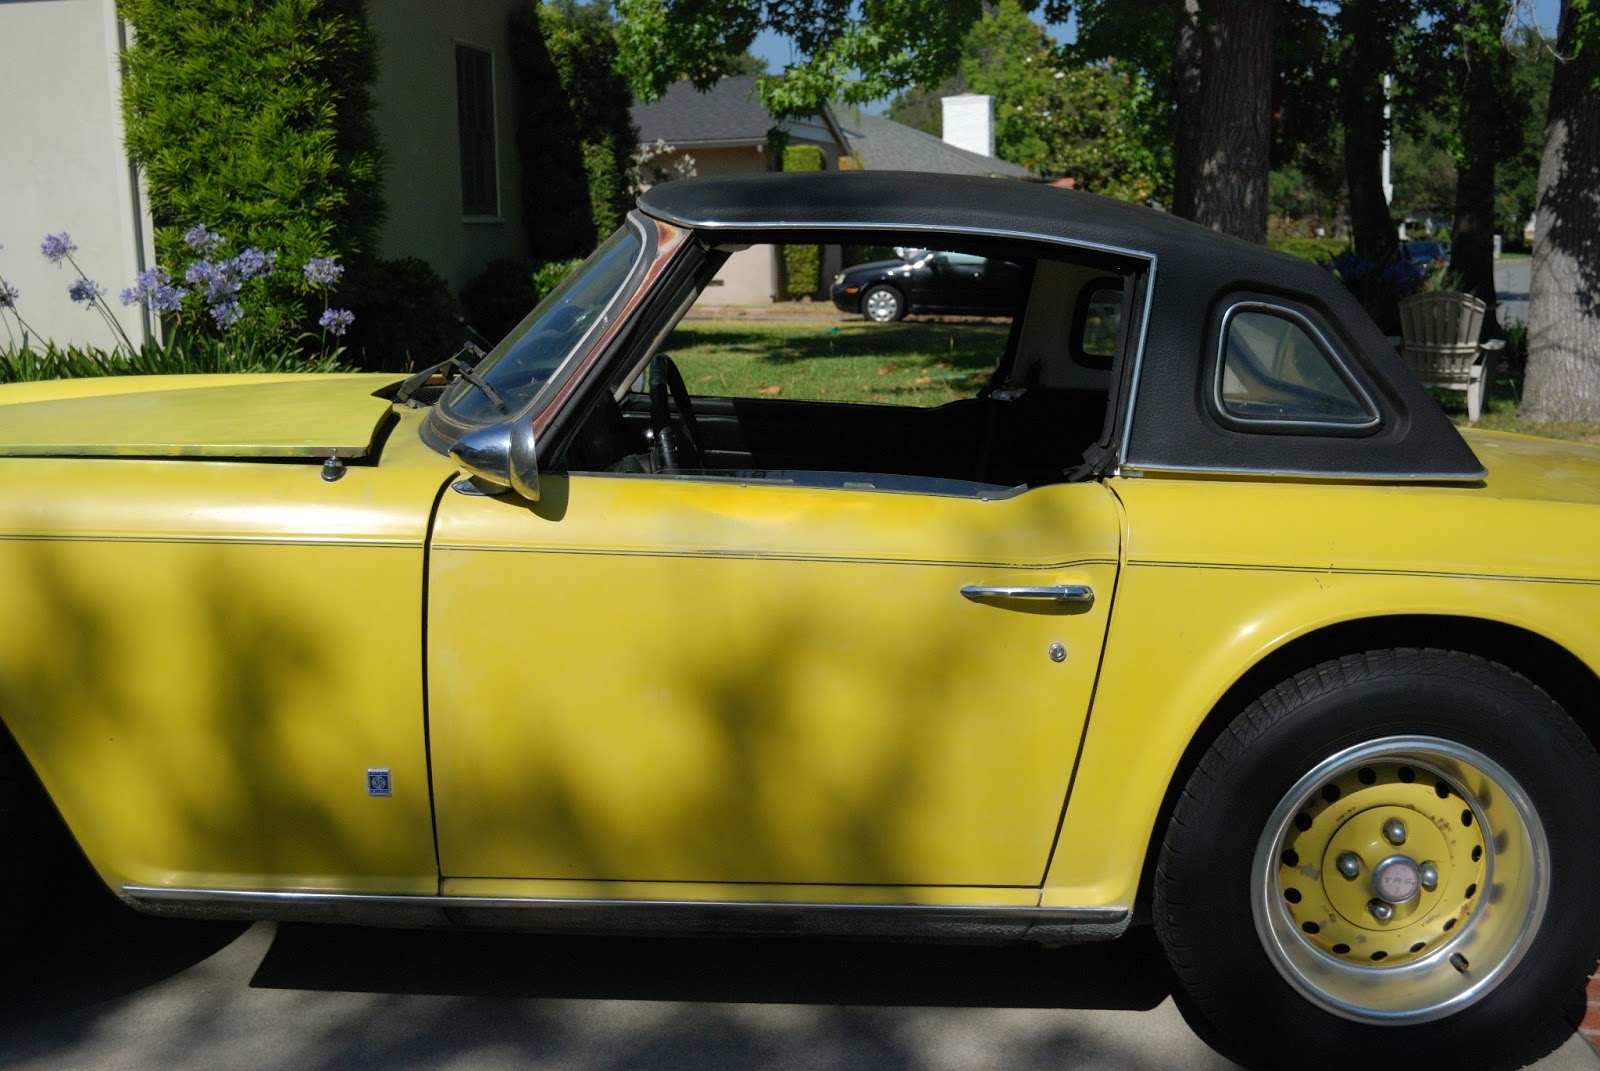
The passenger side is in very good condition for a car that's almost 40 years old, with the exception of the previously noted front fender. The these couple of pictures are mostly to document the door gap on this side to compare it to the door gaps on the driver's side. Notice the gap is a little more narrow here, again it could be an illusion, this side has the door seals in place and the door is snug when it's closed.
Looks pretty good here as well compared to the other side.
Rear
The back of the car is in good condition, the only issue, and it's not really an issue, is the paint worn off the trunk lid. Not a big deal really and not much else to report from here. The exhaust is in really good condition.
Trunk
OK, move along, nothing to see here folks! The trunk area is in great condition! No rust, and yes, that little thing in one of the above pictures is the original leather hold down for the original tool pack. I haven't really played around with it, don't want to tear it up.
Some other things of note.
So far this is the worst spot on the car a far as rust goes. On the other side of this is the drain area for the fresh air inlet to the car, it looks like the drain may have clogged and there's been sitting water here. This will need to be addressed.
Yes, I pulled the car seats out and the carpeting to look at the floorboards. Here's what I found on the driver's side, cracked floorboards where the seat mounts bolt through the floor. Not rust through, just cracks that will need to get fixed, probably will weld them up, grind the weld down and put something on the back side to double this area up and spread the load over a wider area.
So, there you have it. I took quite a few more pictures then what I have posted up here, including pictures of the underside of the car. Just don't want to get carried away with this aspect, I will probably be adding them to one of the picture web sites. Not sure which one just yet, but when I decide I will post the link for this that really want to see all of the details.
I will post again in a couple of days, I have a number of posts in the queue. One of those will be concerning the dilemma I am currently dealing with in my head.
See ya!
My apologies to my visitors today. A couple of days ago I promised some additional pictures of the car and some further analysis of the condition. This may be a long post, if you are going to stick around for the whole thing you may want to take care of some personal business, grab a refreshment of choice and then come on back, I'll be here.
I did take some pictures this weekend, but they were not all that great, I waited until to late in the day to get good ones. So I will have to put that off until next weekend when I can pull that car back out of the garage.
Oh, yes, I did get the garage a little cleaned up this weekend and enough room to move the car inside. It's not a spacious garage to begin with, so there's enough room for the car with some room to walk around it and begin to do some work. I need to do some more clutter removal and move some of the remaining boxes O stuff to the storage room. Need more room around the car to be able to jack it up on stands and role under it on the creeper.
I did find some of my old car repair and diagnostic items, timing light, compression tester, vacuum gauge, dwell meter, uni-sync, block tester, brake tools, so I can start doing some of the things I had set out to do. But some of the assessment that I did on the car this weekend leads me to think I may need to take a slightly different approach then I had originally thought.
The car has been sitting for 8 years, probably out in the sun and it shows. Just about every old piece of rubber on the car is either hard as a rock and crumbling or has turned into putty, it just really depends on where it was sitting on the car. So the gas line is leaking in about three spots, so when you run the car you are dropping gas in three different places. It's not squirting out, but it leaves puddles and the smell after the fact in the garage. So without even considering the rest of the car, there are quite a few hoses and other rubber items in the engine compartment that need to be replaced. I would rather just pull the engine and trans out of the car, clean the entire engine compartment and then start from scratch. What I will probably end up doing is piece meal work to get it running and relatively safe to drive.
What would I really rather do? The whole damn thing.
Pull the body off the frame. Pull the frame apart down to all the pieces lying about, clean it all up, put in the frame reinforcement pieces to augment the frame in the weak spots. Then get it all powder coated and start putting it all back together. New bushings all around, not sure which ones yet, adjustable swing arms mounts, new hubs in the swing arms, converted half shafts with CV joints, differential conversion, new springs all around and upgraded lever shocks in the back. A few other items, but you get the idea.
Once the frame is pristine, the engine and transmission.
I've done a little research on this and I'm not quite finished yet on deciding what exactly I want, but I do now I want something a little more powerful and reliable. I know, don't laugh. I do know that I want the electronic fuel injection, electronic distributor, fan eliminator, lightened flywheel, and the transmission conversion, to new just a few. There's more, but again, you get the idea.
Once the engine and trans are done, the body.
Pull all of the sheet metal off and strip it all done to bar metal. Prep and paint, again this one needs a little more research before I settle on the final desire. I've seen some pretty fantastic work out there on some of the other TR6s, really good quality work on the body shell, and the sheet metal hung back on it.
Now the reality of it is, it's not going to happen this way, at least not at first. I'm going to get the car running the best I can, some of the upgrades will be done, some will have to wait. The frame off work may have to wait a year or two. We are getting rid of the one of the family cars, the freaking Mercedes (the black hole in the ground that sucks money from the wallet) and my current daily driver, the M5 will be going to my wife as her daily driver. She doesn't put the miles on cars like I do and we need the M5 to last at least 3 more years. So the TR is going to be my daily driver, fortunately it's only 17 freeway miles to work each day and so I won't be over taxing the car, just need to stay up with the maintenance.
So, if you have stayed with me so far, thanks for reading the ramblings. I think I will treat each of the short paragraphs a little more in depth in future blogs, so here's what's to come.
A frame restoration plan blog.
An engine rebuild plan blog.
A body shell rebuild plan blog.
Even a blog about the car situation for the rest of the family.
Stay tuned to this station for more updates . . . .
Woo Hoo! It's arrived!
The newest addition to the family was dropped off after the trip down from the Bay Area. I was at the office, so my wonderful wife took care of the details as far as paying for the transport costs and telling the guy where to place the car in the driveway.
No pictures today and probably none tomorrow as well. I need to rearrange the garage and take some "stuff" to storage to give me room in the garage to work on the car. I will save the in person assessment to go along with the pictures I take this weekend.
I do have a list of tasks that I put together the other night as I was waiting for the car to arrive. Things I will do before I actually put it on the road for a drive.
The list goes like this;
-
Tune up including adjust and balance carbs.
- Drain and replace oil and filter.
- Radiator flush and new coolant.
- Check all drive belts and replace as needed, may just replace on GP (General Principle)
- Check front and rear wheel bearings.
- Inspect brake lines and e-brake cable.
- Check brakes front and rear.
- Check trans and diff oil levels, add as necessary.
- Check suspension bushing condition.
Most of this I can do myself and have the tools for it. Many years ago my Dad had a car repair shop and I worked for him for a year. I had the opportunity to learn from some of his years of knowledge, but doing it as a career was not a goal. I enjoy the tinkering aspect and fixing things on my own schedule. I will probably farm out the carb adjustment and balance, I could never get the hang of the Strombergs. My Dad had the knack for them and he never had any problems getting them to work beautifully together, even when using that crappy UniSync.
I will also have to build a frame to store the hardtop, get some new seats (more on that with the pictures) and get a replacement soft top frame and top.
I'll add a few other tidbits just from the first quick look at the car. First, I think it's still in the original Mimosa Yellow, I can see a spot where the paint had worn through to the primer. Looks like the previous owner drove with his arm out the window or something like that because of the wear pattern. But it's really faded and the paint is in poor condition as well as the really stupid spray can paint job in some areas.
With few exceptions, soft top frame being a big one, everything else seems to be there. The obligatory box of stuff was in the trunk, but not a big box, the car will need all of the rubber replaced everywhere it appears and I think I'll leave it at that for today.
So, pictures this weekend, hopefully Saturday, for sure by Sunday, and the beginning of the list of improvements. Going to start with a few simple ones to get back into the tinkering routine.
More to come . . . .
So I left off in my last post with the upper areas of the car. Now we'll take a look at the underside a little and the engine compartment. I also have a couple of other images from the guy who was flipping the car. Do I classify him as an owner? Curious if he actually signed the transfer paperwork or if he just has the signed title and will give it to me?
Under the car from just in front of the engine, doesn't look to bad here. Typical English frame preservative materials (leaked oil) in some places, a little rust here and there, but nothing major that I can see in the picture.
This time just in front of the back wheel looking forward. Again the frame looks good from this shot, no major dings or collapses in the frame and the drivers side floorboard looks very nice.
At the very back of the car looking forward again. Not much to see here, the muffler looks to be in okay condition and no major rust visible from this angle. When it gets to the house I'll have a look again with more light and a little light poking.
Another view of the driver's side floorboards from below.
Passenger side floorboard and frame area. The plug on this side looks like it's popped out of the hole and maybe the hole is a little deformed, hard to tell for sure. Something I have on my list of things to check more in depth when the car gets here.
The engine and engine compartment. Obviously will need a new shroud for the radiator and air filters for the carburetors. A little bit of rust here and there, no major issues though and with the exception of the air filters, it looks like all of the bits are there.
The view from the other side. Again, looks like just about everything is there, just old and in need of some care. It looks like even the battery tray is there and doing it's job.
This is a shot of how the person selling the car found it. He told me it had been sitting out in front of this house for some time and hadn't moved. He had left a few notes on the car expressing interest in purchasing it and finally someone called him about it. Turns out is was owned by an older German gentleman that had passed away and he was the original owner of the car. I'm curious if the 78K miles are all that's on it from an original miles perspective.
Notice a couple of things here. First, the hood/bonnet in the picture is black, not yellow. Second, there is an area under the driver's side door that looks like the paint has work off down to the primer.
Car sitting inside the garage at the seller's house, waiting to be picked up for transport to me. There is a box of "stuff" coming with the car, pretty standard for Triumphs I hear. The car should be arriving either tomorrow or Thursday at the latest. Doesn't look to bad from this angle.
More to come . . . .
I see this blog as a record for me,and anyone paying attention, of what I find about the car as I move through this journey and how I deal with it. Also as a record of what I do to improve the usefulness and quality of the car.
I'm going to post some of the photographs I have of the car prior to it's arrival here at the house and some observations based what can been seen in the photos. So here goes!
Full right side view of the car. This is how I first saw the car on eBay and what grabbed my attention. It had a hardtop, one of my requirements and the body looked pretty straight. Not a big fan of the yellow wheels, liked the original color on these wheels much better and will be getting back to that as soon as I can. The windshield frame needs to be refurbished, it's rusty and looks like a mess. Also, there is some paint chipping around the front wheel well, but the front fender will probably be replaced, more on the later. One final comment, the paint on the hood and surrounding the hood joint does not match the rest of the paint, cheap spray can job it appears.
Confirmation of the spray can paint job on the hood and gap area as well as the condition of the windshield frame. It's nice that the little blue badges are in their original spots and I am curious if this is the original color and paint? I'll find this coming week.
Not to bad from this angle, the door gap looks good for the most part. Going to get rid of those stupid black lumps on the bumpers, I really hate those things.
The poor spray can paint job is even more evident from this view as well as some of the paint chipping around the wheel arch and scratches.
There it is, now we can see the ding in the front fender by the light, the scratches and the color difference between the hood and the fender. Also evident here is the need for a refurbishment of the front grill surround, the covering has bubbled up from the rust underneath it. Ugly bumper over-riders needing to be deleted.
The grill surround as mentioned before but also you may notice the front lip of the hood. Looks uneven and crimped in a couple of places. This is a little strange in my view and makes me wonder a little. In a picture I will put up in a few moments you will see a black front hood on the car, like a replacement was done. Did the seller take the new hood to sell separately and put the old hood back on the car? Curious.
Not to bad from this angle, other then what has been previously mentioned. One thing that is not obvious until you see a later picture is the paint patch on the upper door area. It looked like the paint had been worn through to the primer. You'll see that in a few more pictures.
More of the left side of the car.
Left side 3 quarter view from the back. Looks like the door is not closing all the way, or maybe they didn't close the door all of the way. Something to look into.
A little closer and a little lower then the last, that door . . . .
From the rear with the trunk lid open. Looks like the black paint on the lip of the truck has worn off and there appears to be some rust staining on the lid as well. Something else to take note of.
Looking down inside the trunk, looks surprisingly good in here. A little bit of rust here and there, but nothing major to speak of. Gilbert had mentioned that is was really clean looking, this kinda bears it out.
Wow! Floors look fantastic! Gilbert mentioned that it appears as if they have been painted, but they look original with no major rust cancer or even pin holes! Carpet is gone and the passenger seat needs to be redone. Steering wheel as well is a little tired at this point. Missing the radio and the boot over the gear shift level. The hood release is sitting on the floor.
Again, the floor looks great! The dash is all there as well as all the switches and it looks to be in pretty good condition. The dash pad doesn't look that bad. The drivers side door covering is looking a little tired at this point.
More to come . . . .